
For this, you will need:
A throw pillow
Fabric to cover it
Thread
Invisible zipper (it must be at least as long as one side of your pillow)
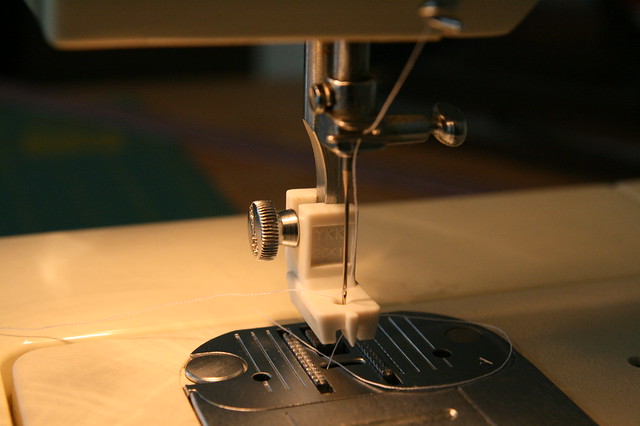
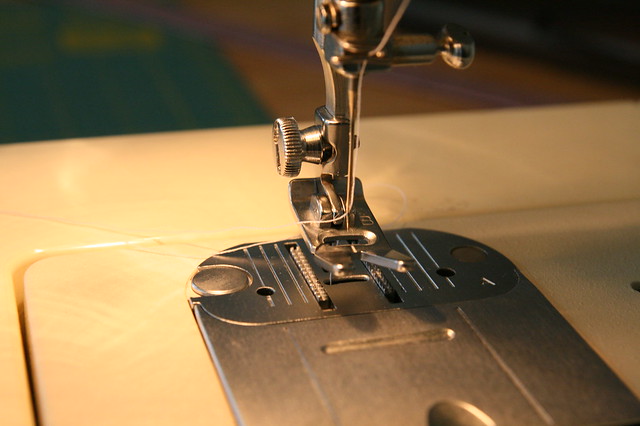
You will also need an invisible zipper foot for sewing the invisible zipper. It will allow you to sew as close as possible to the invisible zipper so that it will not show when finished.
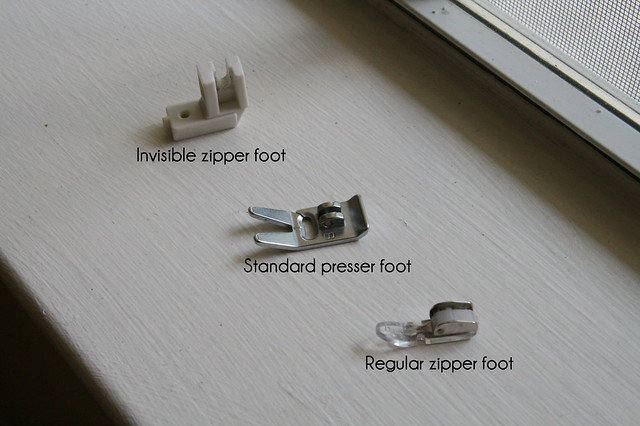
Your machine may come with a regular zipper foot, but you will need to purchase a separate foot for the invisible zipper. I bought mine while in Singapore so it may be a little different from the one sold in the US. For more information about invisible zipper feet, you can check out this website.
1. Measure the dimensions of your throw pillow. Add 1/2” to your measurements of the length and width to provide room for seam allowances (1/4” on each side). For example, my pillow measured 18” x 18” so I cut my fabric as 18.5” x 18.5”.
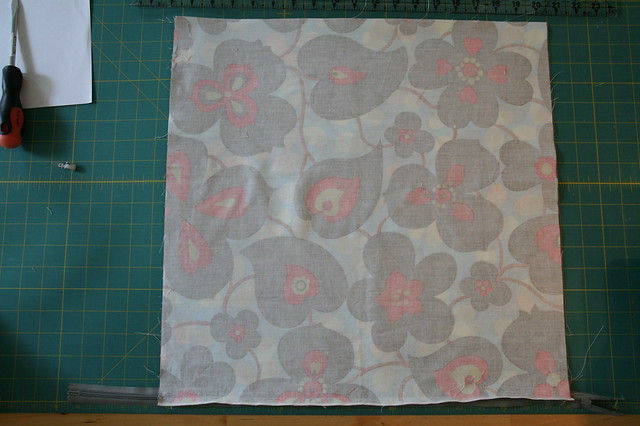
2. Cut out 2 pieces based on your measurements.
3. Unzip the zipper and using a warm iron, press open the invisible zipper. This will help the zipper to lay flatter, which will then allow you to sew closer to the zipper teeth.
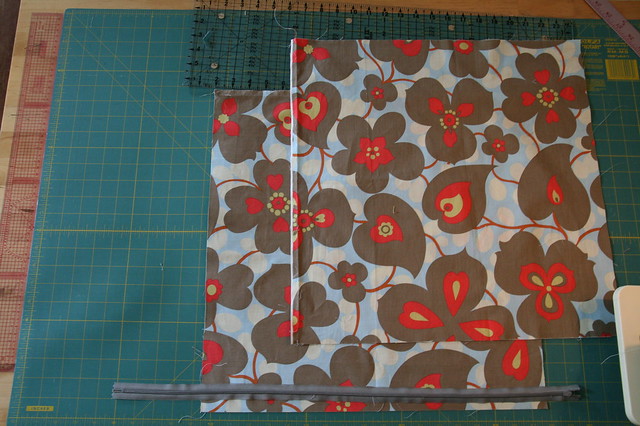
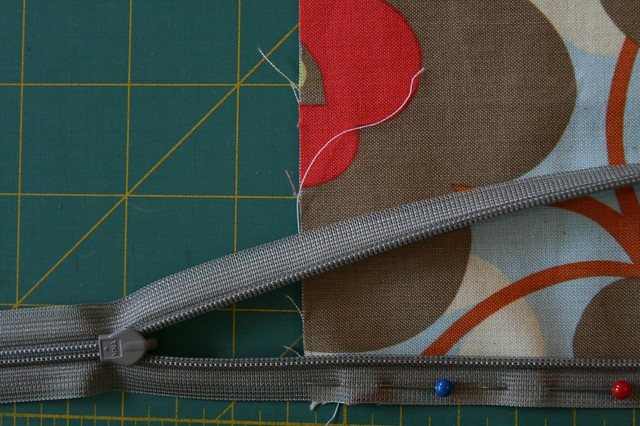
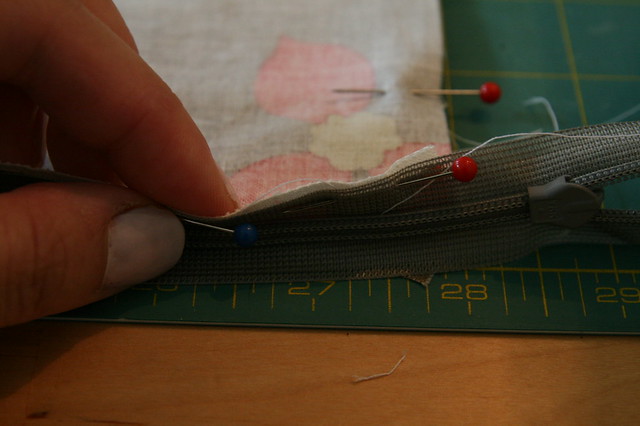
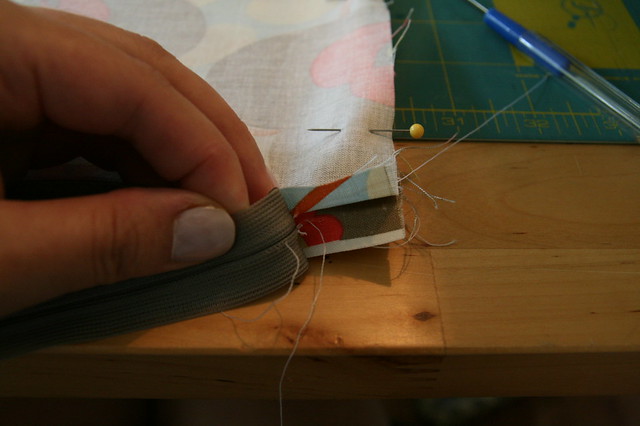
4. Place one piece of fabric with the right side up and place the invisible zipper face down along the bottom edge.
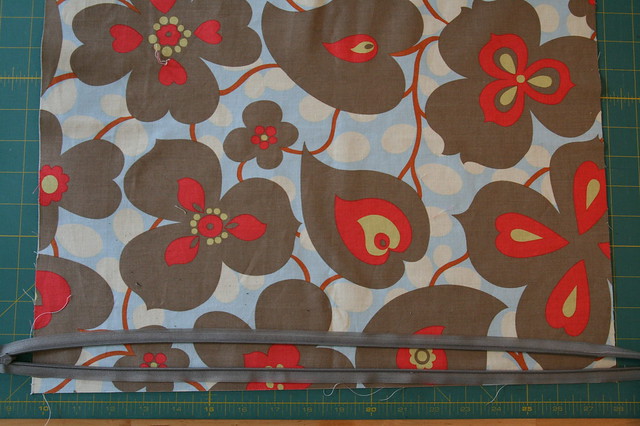
5. Align the bottom edge of the zipper with the bottom edge of your fabric and pin. Make sure the zipper extends beyond the fabric on both sides and the zipper head is past the edge of the fabric. This will make it easier to sew as you will not have to maneuver around the zipper pull while sewing.
6. Switch out the standard foot on your machine for the invisible zipper foot. For this, you must unscrew and remove the presser foot and shank.
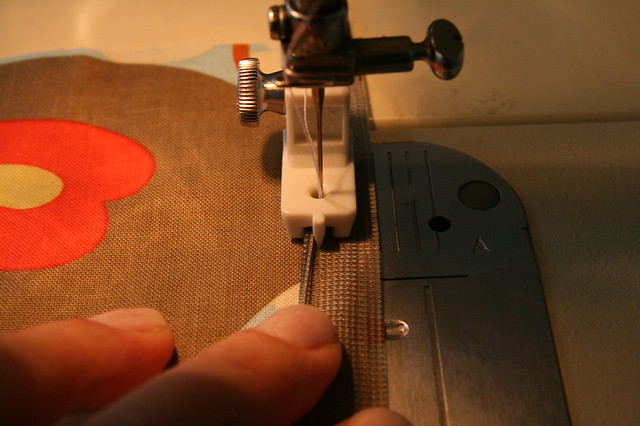
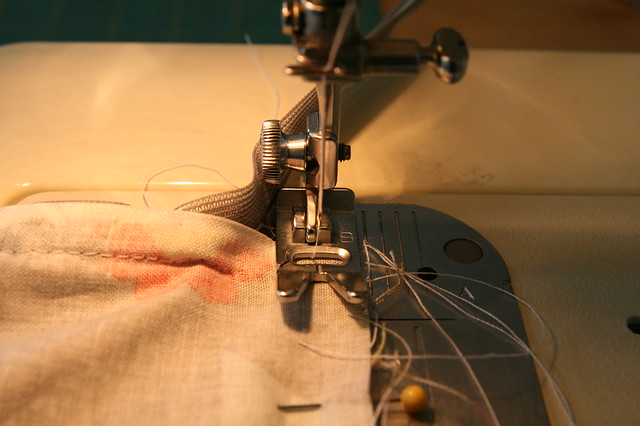
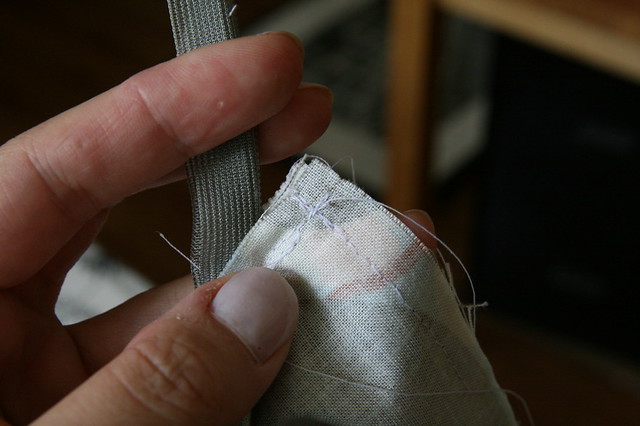
7. With the edge of the fabric facing the right side, line up the zipper teeth with the left groove of the invisible zipper foot. Sew the invisible zipper to the fabric. (Tip: Use your fingers as shown in the picture to hold the invisible zipper open as wide as possible to ensure that you are sewing as close as possible to the zipper teeth. This will help minimize the amount of zipper that shows when you are finished.)
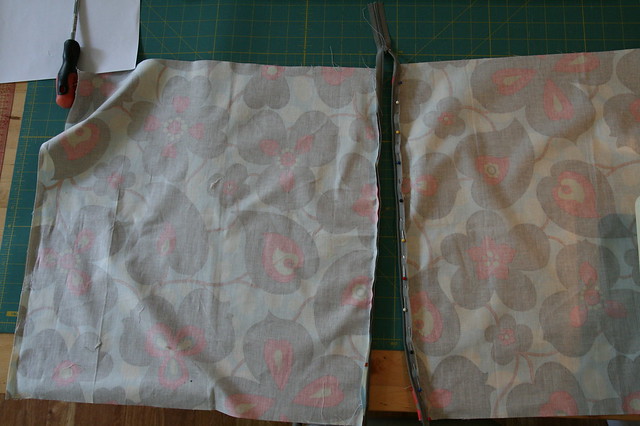
8. Close the zipper and lay the piece sewn to the zipper with the right side facing up. Take your second piece and lay it wrong side up on top of the first piece, lining up the edges and corners. You may want to put a couple of pins on each side close to the zipper to help the piece stay in place.
9. Lift the free edge of the zipper towards you and line it up with the edge of the top piece of fabric. Make sure the right side of the top piece is facing the right side of the zipper. Pin the bottom edge of the top layer to the free edge of the zipper.
10. When you are done, open the zipper all the way. This is so that when you are sewing, you won’t have to sew around the zipper pull.
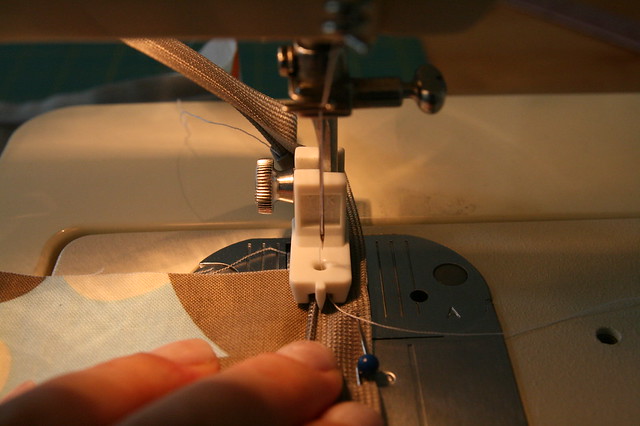
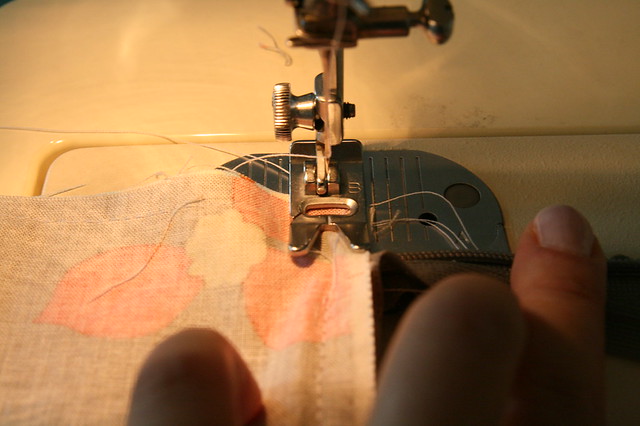
11. With the raw edge facing the right, line up the zipper teeth with the left groove on the invisible zipper foot. Sew the zipper and fabric together, using the same technique as before.
12. Zip the zipper halfway to two-thirds of the way, making sure to leave an opening (this is so that you will be able to unzip the zipper later to turn the pillowcase inside out. If you leave it shut, it will be hard for you to reach the zipper pull since it will be sewn inside the pillowcase).

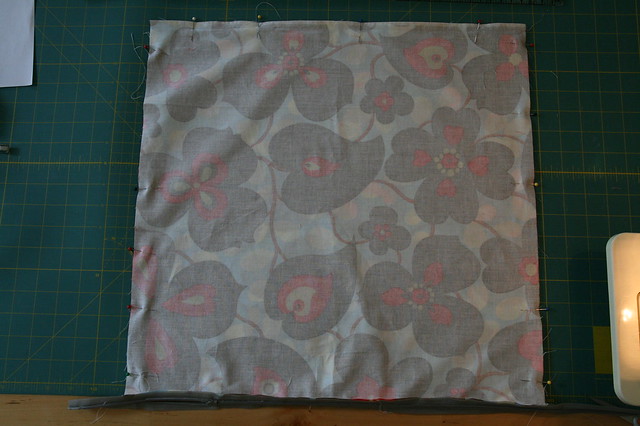
13. Match up the sides and corners and pin the two pieces together around the edges.
14. Switch out your invisible zipper foot for the standard foot.
15. Pull the zipper back about 1” from the edge of the fabric (you may need to undo some of the stitching holding the zipper and the fabric together).
16. When sewing, you will want to sew the three non-zippered sides of the pillowcase together first leaving a ¼” seam on all sides. It is best to start sewing perpendicular to the zippered side, this way you can sew all three sides together in one shot. To begin, make sure to pull the zipper away from the edge of the fabric and sew only the two pieces of fabric together.
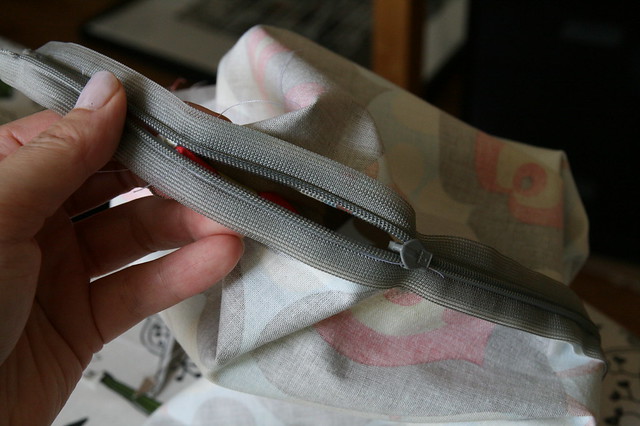
17. To finish off the side with the zipper, you must sew closed the gap left between where the zipper starts and the corner. While holding the zipper at a 90 degree angle from the fabric, sew from the corner to where the zipper starts, (about 1” in from the sides). See picture below.
18. When finished, the zipper should bend out away from the zippered side.
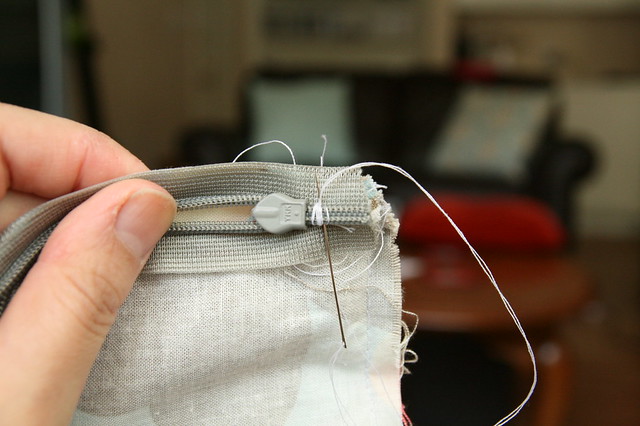
19. Hand sew a few stitches at the end of the zipper to keep the zipper head from sliding off. Then trim off the excess zipper.
20. Trim the points off each of the corners.

21. Reach into the opening and unzip the zipper. Turn pillowcase inside out. Push out corners with a thin pointed object so that the corners are pointed (I use a chopstick).
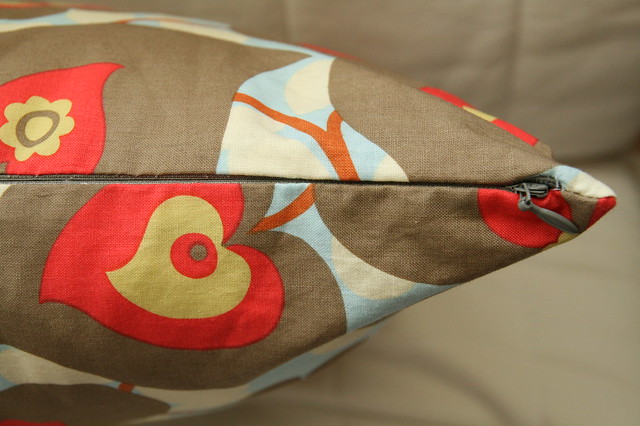
22. Stuff your pillow in, zip it up, and there you have it! A brand new pillow to decorate your room with!
No comments:
Post a Comment